Showing posts with label Cricut. Show all posts

Sunday, September 14, 2014

Artfully Sent: Pop Up Cards!


Welcome Back!  I'm here with my third and final (for now) card created with the Artfully Sent Cricut Cartridge.  This one is my favourite.  I've loved seeing the pop up cards that talented crafters have created.  I'm all about the simple, hence the name Simply Creating, and so pop ups seemed like too much work for me.  This Cricut Collection has changed all that and I'm excited!!!

Here's the front.  


Isn't that fun?  But wait till you see the inside!


Super cute and super fun and fairly easy to put together.  There are score lines where you fold the balloon in the  middle to help.  It took some figuring out that I had to cut the top and bottom so the balloon would pop.  Then I used my fingers to pull the sides forward where the balloon is still attached.  You'll want to be careful where you put your adhesive so that the sentiment on the front doesn't show any.  

The entire card is cut from two pieces of cardstock, Glacier and Thistle.  The banner cuts are also linked to it, which make it easy to cut the cards.  Perfect!  And so fun to put together.  Here's another shot of the balloon from the top so you see how it pops.


Here's a tip.  Don't put adhesive on the middle of the banner, just on the ends.  I figured that out the hard way.

I hope to have some more photos of artwork created by our corporate art department to post soon.

I can't wait to get my hands on this cartridge and create some more of these!  Order yours today on my website or you can email me directly.  I've got an order going in later this week so I can add your collection to it.  Don't forget that when you do, you'll be entered into a draw for a Workshop on the Go of your choice. 

Happy Creating!


Saturday, September 13, 2014

Artfully Sent: Sentiment Cards

I'm back with another card created with the newly released Artfully Sent Cricut Cartridge.


There are lots of different types of cards available on the cartridge, with one being these neat sentiment cards.  The card base is cut with a sentiment in the front.  You can leave them as is or cover the back like this card I created at convention.


We backed the hello with Glacier cardstock and the sunshine with Colonial White, then added a Canary insert that covered the whole inside of the card.  Here's a close up of what's all cut out of the front:


There's some Gold Shimmer Trim and Gold Sequins added along with some stamped flowers.  Love this one!  But my favourite card is still to come.  Stay tuned to tomorrow's post.

Hop on over to my website to purchase your own Artfully Sent Cricut Collection.  Remember, anyone who orders a collection from me by Sept. 30, will be entered into a draw for a FREE WOTG kit, of your choice.

Happy Creating!


Friday, September 12, 2014

Artfully Sent is Here!

As I'm sure you're already aware, our newest, much anticipated Cricut collection is now available to order!  And we're all VERY happy!  I'm hoping mine will be on the way later today.

 
Maybe I should explain why we had a delay of over a month (Consultants have been waiting since convention in June!).  Our Cricut cartridges are made by Provocraft, like all Cricut cartridges.  With their release of the Explore machine they have had some things to deal with and just didn't get our cartridges done in time.  They just arrived in the CTMH warehouse yesterday, and were made available to order immediately.


I've had some people ask me about projects made with this cartridge.  I don't have too many, just the three I created at convention, but I'll share them here today, and the next two days.  Here's the first one:


This is one of the swing cards.  Everything cuts out for you.  And there are really tiny ticks where you need to score your card, even smaller than our previous cartridges.  Here's another view:


Want to see more?  Just pop over to my website here.  Scroll down where you'll see links to sample cards and the shape index.  Then place an order and it will be on the way super quick.  Everyone who orders a collection, either on my website or through me directly will be entered in a draw for your choice of Workshop-on-the-Go kit*.  Just my way of saying thank you for being so patient.  

Come back tomorrow for another Artfully Sent card.  Happy Creating!

*This WOTG offer is only available through me, Krista Ritskes.


Tuesday, April 15, 2014

Cross Canada Hop: Focus on Artbooking

Welcome to another Cross Canada Blog Hop!  We're featuring Close To My Heart's newest Cricut Collection, Artbooking this month.  I absolutely love this collection.  There are so many possibilities with it and even if you don't want to "outside the booklet" you can create some stunning artwork.

If you hopped onto my blog to start, just keep clicking until you get back here but if you'd like to literally "hop across Canada" you can start at Michelle's blog.  If you came here from Arlene's blog you're on the right track.

Here is my project:


Does that look familiar?  It should.  I shared this 3-ring album during another Cross Canada Blog Hop.  I finally finished the inside!!!  I'm so excited about it because it turned out way better than what I pictured in my mind.  (Normally that ends up the other way!)  And, my kids love it.  (*Side note: If you watched the TV segment that my kids were on with me, you'll have seen some of this already!  Haven't seen it?  Just click on the photo titled "March Break TV Segment" on the sidebar.)

Take a look through the pages and then I'll explain what I did.


I cut my pages from various 8" mini album pages and then basically cut shapes from lots of different 8" pages as well as a few things from the sports themed pages.  I cut items in multiple colours and then went to work, placing them where I liked them.  I went searching for black embellishments and added them in as well.  It took longer than I thought, but I just left things laid out and came back to it when I could.  I used almost every single piece I cut out. 

Now, hop on over to Sheri's blog and check out what she's created!

Happy Creating!

Supplies:


Friday, April 11, 2014

Cricut Crafts for Kids

How's that for alliteration?  :)

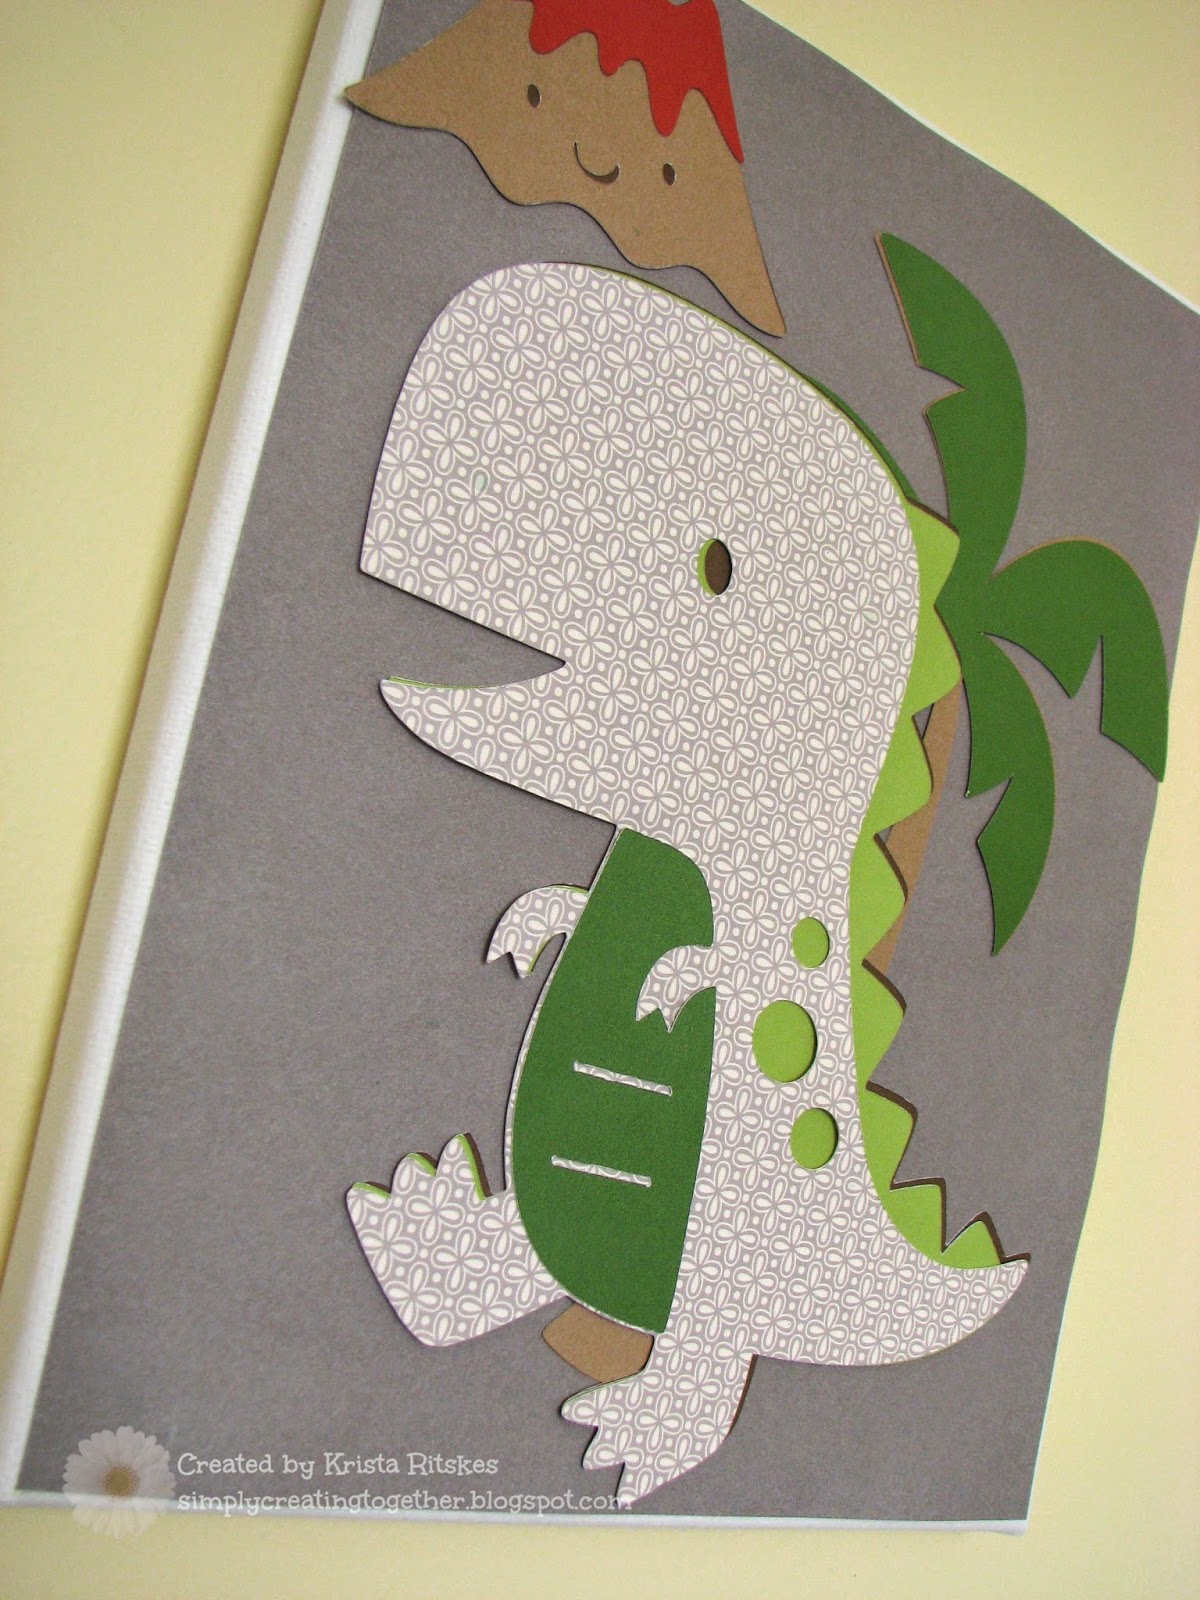
I had so much fun planning this project with Nathaniel.  Arianna already has a canvas in her room, made during her birthday party last year, so it was Nathaniel's turn to create a fun picture to hang on his wall.  This is the canvas the kids were working on during our March Break TV segment on Rogers.  Check it out here.


All the images were cut with the Create-a-Critter cartridge.  In this next photo you can see how it was attached to an 8x10 canvas.


All the papers we used were Nathaniel's choices.  He asked for particular colours and I gave him options.  In fact, I had a different idea for the colours, but I love how it turned out.  The patterned grey is from the Babycakes paper packet.  Then we used some Chocolate, Sweet Leaf, Topiary, Cranberry, Slate and Desert Sand cardstock.  He and Arianna put it all together and I used Liquid Glass to put it on the canvas.  It totally suits my dino-loving boy and it was so very easy!

Canvas multi-packs are on sale at Michaels this week, at least here in Canada, so it's the perfect time to stock up!

Happy Creating.

Sunday, February 9, 2014

Kraft Container: The Perfect Gift, Valentine or Not

I have one more project to share that I spoke about on daytime Durham on Thursday.  This might just be my favourite of all of them and it didn't get too much air time.  There's only so much you can talk about in 5 minutes!

This is the Kraft Container I decorated up for a "Teacher Survival" kit. You could use this for any kind of gift, though.  It really didn't take much time to create.  I think the part that took the longest was the tag and ribbon!
 

I used the Ivy Lane paper pack and accessories.  (I am totally in love with those purple fabric flowers!)  The rolled paper flowers are cut with the Art Philosophy cartridge, using Ivy Lane and Hollyhock cardstock.  I actually just used a hot glue gun to put them together so it went REALLY fast. If you're at all like me, you probably like to see a lot of photos of a project like this, so here are some closeups.


And here's the top.


 I left the rest of the container pretty plain, letting the patterned paper shine.


And here's a close up of the tag.  I cut it with Art Philosophy and used second generation and Bamboo ink to add a pattern.  The stamp set is In the Background.  I also used Old World Alphabet (retired, I think) in Hollyhock ink for the words.  Then I sponged the edges with Bamboo ink.  I tied some seam binding ribbon on the the top of the tag and hot glued it on to the container.  


I also have one more project that we didn't get a chance to talk about on the show.  Another lollipop!  I made this one into a flower.  I simply cut two flowers out of Ivy Lane paper, using Art Philosophy, and one from Cocoa cardstock, all at different sizes.  I found the inspiration for this one at Inkspired Treasures.


Here's the side view so you can see the leaf.  I melded a rectangle onto two leaves in Cricut Craft Room so I could wrap it around the "stem".  I did add a bit of tape under the flowers so everything would stay put.


I hope in all these projects you've found some ideas for what to create for the people in your life this Valentine's Day.

Don't forget, you have until midnight to comment on my giveaway post here.

Happy Creating!

Friday, July 12, 2013

Close To My Heart's New Artbooking Cricut Collection

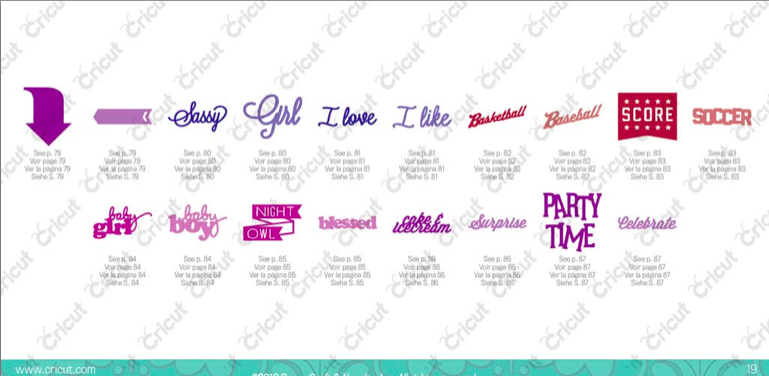
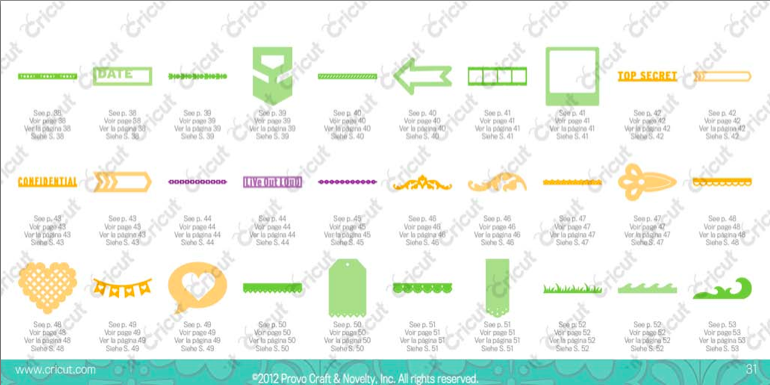
You've been asking, so here it is, all the info on CTMH's new Artbooking Cricut Collection, available for order on August 1.

Some of these photos were taken with my iPhone, so I apologize for the quality.  Here's the entire collection.

Booklet and overlay.
(Notice it's set up according to the qwerty keyboard again.  So handy!)

Sweet & Lovely stamp set (Love that journaling spot!)

My Life stamp set (perfect for our new Crush books, too)

Take Note stamp set (Again, another great journaling spot.)

 Framework Dimensional Elements (chipboard, 2 1/2 to 3")

 Signage Dimensional Elements (1 to 2", Hexagons!)

 Snapshots Dimensional Elements (2 to 4 1/4", polaroids, love it!)

Here are some details before we go on to more pictures.  
  • features mini-albums, complete scrapbook layouts
  • everything is cut proportionately, so set your dial to one size and with one key, you can cut an entire layout or pages for a mini album.  That means no more guess work!
  • don't want to use the set size?  Just hit Real Dial Size and cut things at whatever size you want.
  • 30 keys dedicated to themes, such as birthday, new baby, vacation, friends, sports, Halloween, Christmas and more
  • 20 keys dedicated to mini albums
  • lots of supporting images that can be used on their own, with our stamps or on another project
  • 700 images to choose from
  • full and partial page overlays to use directly on your project, or as a mask
  • not a scrapbooker?  All these images can be re-sized to fit any card you're making.
  • adorable font and a variety of phrases and titles
  • AND, all this for just $99, a retail value of nearly $125!
Don't believe me?  Take a look at the pages from the booklet.


Thank you to another consultant, Paige Dolecki, for offering the use of these images!

Want one now?  Join my team as a CTMH consultant and you can order it right away!
$99 not in your budget?  Host a home gatherng after Aug. 1 and get it for half-off.
Or, just let me know you'd like one and I'll put you on my pre-order list.

Happy Creating!