Showing posts with label valentines. Show all posts

Sunday, February 9, 2014

Kraft Container: The Perfect Gift, Valentine or Not

I have one more project to share that I spoke about on daytime Durham on Thursday.  This might just be my favourite of all of them and it didn't get too much air time.  There's only so much you can talk about in 5 minutes!

This is the Kraft Container I decorated up for a "Teacher Survival" kit. You could use this for any kind of gift, though.  It really didn't take much time to create.  I think the part that took the longest was the tag and ribbon!
 

I used the Ivy Lane paper pack and accessories.  (I am totally in love with those purple fabric flowers!)  The rolled paper flowers are cut with the Art Philosophy cartridge, using Ivy Lane and Hollyhock cardstock.  I actually just used a hot glue gun to put them together so it went REALLY fast. If you're at all like me, you probably like to see a lot of photos of a project like this, so here are some closeups.


And here's the top.


 I left the rest of the container pretty plain, letting the patterned paper shine.


And here's a close up of the tag.  I cut it with Art Philosophy and used second generation and Bamboo ink to add a pattern.  The stamp set is In the Background.  I also used Old World Alphabet (retired, I think) in Hollyhock ink for the words.  Then I sponged the edges with Bamboo ink.  I tied some seam binding ribbon on the the top of the tag and hot glued it on to the container.  


I also have one more project that we didn't get a chance to talk about on the show.  Another lollipop!  I made this one into a flower.  I simply cut two flowers out of Ivy Lane paper, using Art Philosophy, and one from Cocoa cardstock, all at different sizes.  I found the inspiration for this one at Inkspired Treasures.


Here's the side view so you can see the leaf.  I melded a rectangle onto two leaves in Cricut Craft Room so I could wrap it around the "stem".  I did add a bit of tape under the flowers so everything would stay put.


I hope in all these projects you've found some ideas for what to create for the people in your life this Valentine's Day.

Don't forget, you have until midnight to comment on my giveaway post here.

Happy Creating!

Saturday, February 8, 2014

Valentine Gifts for the Teacher ... Or Just a Way to Make Someone's Day

Here we are on part two of the projects I shared on daytime Durham on Thursday!  I had so much fun creating these little packages.

Today's projects are the three burlap bags I decorated up.  These bags are so versatile and really don't need a whole lot to make them look fabulous!  Here are the bags:


Here's what I used on the bags:
Left:  For Always Textiles, Pearl Opaques (retired), Epoxy Bubbles, Rosewood Mini-Medley, Floral Base & Bling (retired).
Centre: Ruby Chevron Ribbon, Ruby cardstock, sanding block, Sarita Accessories, Neutral Metallic Baker's Twine.
Right: Dimensional Elements Hearts (retired), Balloon Ride Accessories, Neutral Metallic Baker's Twine, Creme Brulee dark Alcohol marker, Juniper Alcohol marker, Lagoon light Alcohol marker, and Sorbet Alcohol marker.

As I said on the show, I used Liquid Glass to attach pretty much everything, except the ribbon which was stitched right on the bag.  It's important to remember to stick a piece of cardstock inside the bag before you glue anything on.  You don't want your bag to be glued shut!

These can be filled with all kinds of fun goodies.  Fill them with chocolate hearts, gift card for Tim's or Starbucks, some sweet smelling hand cream or a manicure set, tic tacs and other mints, hand sanitizer and tissues.  Whatever will fit!  

Don't forget about my giveaway on Friday's post!  You have until Sunday at midnight to comment.
Stay tuned for my last Valentine post.

Happy Creating!

Friday, February 7, 2014

Fast and Fun Classroom Valentines Plus a Giveaway!

I'm so excited to share these super fun ideas for classroom valentines.  If you're here because you saw my segments on Rogers TV yesterday, welcome!  

As I said on daytime, I wanted to come up with some ideas that were (mostly) candy-free.  My kids get SO much candy for all sorts of special occasions at school.  I wanted to offer something different, as I'm sure other moms are thinking as well.  

Almost all these ideas came from a search on Pinterest.  I've included the links so you can see how each one is made.

First up is this fun one I actually designed myself!  The moustache is from our Artiste cartridge and the straw from the local Michaels dollar bins.  The sentiment is printed with my computer and those glitter hearts are from our new Pink Glitter paper and punched out.  You'll see them on some other valentines as well.  I just couldn't help but use that paper!  I used a piece of Ivy Lane paper to back this one.


This next one was inspired by this post on Happiness is Homemade.  I used the new Owls stamp set and printed the sentiment out with my computer.  The owl is coloured with our Alcohol markers. I used Lollydoodle to back this valentine.


This fun valentine, which my daughter wants to make for her class, is inspired by one on Tompson and Spring.  It's cut from a piece of Hollyhock cardstock and stamped with Black ink.  And, yup, more glitter paper hearts.  The "you Rule" is stamped with an upcoming Stamp-of-the-Month, Circus Alphabet, and the sentiment is from Holiday Tags.


I love this one.  Every student needs another glue stick at this time of the year.  The sentiment is printed with my computer.  The Happy Valentines Day is the same as above, stamped in Hollyhock ink.  I got this idea from Re:Located Living.  The glue stick is taped on with Washi Tape, easy peasy! (And another glitter heart, of course.)


This next one is from Bits of Everything.  I printed the first part with my computer and cut out the hearts with my Cricut.  The white one is from Art Philosophy and the Ruby, scalloped one is from Craft Room Basics.  The lines and "write" are stamped in black with Classmate Alphabet (which might be retired now).


This last one is just a print out and I did not design it.  It was just too much fun, I had to include it.  It's from Zakka Life.  She has a free file for four different mask and cape combinations.  My printer is running out of ink so it printed with some lines, but her file is perfect.  There's my only bit of candy.  ;)


I hope you find these helpful and that you'll think about creating your own versions to hand out next week.  I'd love to know if you decide to make some.  Post in the comments below to let me know.

And now the GIVEAWAY!  Comment below telling me which one is your favourite and you will be entered to win one of the brand new M-size stamp sets, Hi.  (It's one of my favourites!)


This contest is open to anyone in North America.  You have until Sunday at midnight to enter.  The winner will be posted on Monday.

Happy Creating!


Friday, March 29, 2013

CTMH: You+Me=Heart!

I'm trying hard to catch up on some blog posts I promised to do.  It's been a little while since my Valentine's Day appearance on daytime Durham, but I did say I would post photos of the card I made.  Here it is:


It might be all about love, but I think you can give this to your main squeeze any time of the year.  I used the Dakota paper packet, Pacifica, Slate and Whisper cardstock and the Whoo's Your Valentine stamp set with Barn Red ink.  The pocket was cut with the Cricut but I can't remember which cartridge.  I also sponged Slate ink on all the edges.  I added a couple Artisan studs, but I can see that one fell off.  The Baker's Twine is Grey Flannel (retired).

Happy Creating!

Thursday, February 14, 2013

Durham Daytime Love Banner

Happy Valentine's Day!  If you are visiting because you saw me on Durham Daytime this morning, welcome!  I'd love for you to leave a comment and let me know what you thought of my projects.  I thought it would be a nice idea to post the instructions for the banner we made.


It's super easy, so here we go.

I used my Cricut and the Close To My Heart Art Philosophy cartridge to cut the banner pieces.  If you don't have a Cricut, you can easily cut them by hand.  
I used Cricut Craft Room, so I'm not 100% sure what size you would set your dial to, but the base is 5" wide and the stamped triangle is about 4.5".  The base is cut from Hollyhock cardstock, the triangle is from Blush.


Sponge the edges of the Blush triangle with Hollyhock ink 
and your favourite distressing tool.


Stamp your chosen images in blush ink.  I used Card Chatter-Love and Love Life.


Attach your two pieces together.


Using dimensional adhesive, like 3-D Foam Tape or Pop Dots, attach your letters.


Attach your favourite ribbon to the top of each piece.  I used Glue Dots.


Gotta add some more bling!


Using mini clothes pins, attach your banner pieces to a strip of hemp or twine.  Be sure to leave enough on either end to hang up your lovely new banner!


I hope you see just how easy it is to add some fun decor to your home.  I also hope you'll check out more of my blog and sign up to get my posts in your inbox.  You'll find the sign up box at the top right.  Better yet, email me for more information on my classes and Close To My Heart products.  I'm looking forward to hearing from you!

Stay tuned, I'll be posting photos of the card we made in the second segment later.

Happy Creating!

Tuesday, February 12, 2013

CTMH: Capture The Love Moments

I had to share my favourite new product in the new Spring/Summer Idea Book.  It's perfect for this time of year, too!

Here it is:

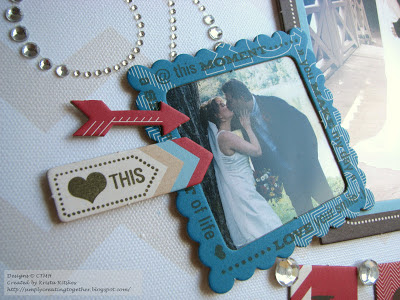
This is the Workshop On The Go Canvas Art Kit.  It's beautiful and super easy to put together.  Everything you need is included except adhesive, blocks, and pigment ink.  The 12x12 canvas comes pre-printed to make it even quicker.  You'll want to have your Liquid Glass, Glue Dots and 3-D Foam Tape handy to put everything together.  An easy-to-follow, full-colour instruction brochure is included.  

Here are a couple of close ups of the fabulous accessories included:


I loved going through my wedding photos to find the perfect ones for this project.  We're celebrating our 10th anniversary this August so I'm feeling sort of lovey-dovey lately.  (Grin!)

I hope you don't wait for Valentine's Day to celebrate the special people in your life.  Happy Creating!

Monday, February 11, 2013

Simon Says Stamps: Love Card

Valentine's Day is almost upon us.  Have you been crafting away, creating little treats for your kids to give out, decorations to put up in your home, or that something special for your honey?  I've been having some great fun creating.

I won a Simon Says Stamps Card Kit from my friend Sarah a while ago and have had some fun creating with it.


I used this card by Sam as my inspiration and almost did exactly what she did.  Sometimes you just love a card that much!

Here is my take:

The "with love" background is just strips of washi tape!  I love washi tape and this one was so perfect.  I only used items that were included with the card kit and it was great fun.  Here's a close up of all the layers.


Happy Creating!


Thursday, January 31, 2013

CTMH: February Stamp-of-the-Month Blog Hop

Welcome to another Stamp-of-the-Month Blog Hop!  If you've come from Vicki's blog, you're on the right track.

As consultants we are all very excited about the release of our new Spring/Summer 2013 Idea Book!  I'm sure you'll see lots of brand new product on the hop this month, including my post.  This month's stamp set has four images with lovely sentiments.  Here's what it looks like:


I used the current Retro Sketches sketch for my card.


Here's my card:

Instead of using the extra layer of paper, I drew a black line around the edges of the card.  And since I used this card base, I didn't really have room for the text on the right.  The hemp can be untied to open the card. Here's a closer look at that fabulous new hemp.


Products used:

Now it's time to hop on over to Lori's blog and check out what new (or not new) products she's used.

Happy Creating!

Tuesday, February 10, 2009

Some non-traditional valentines to get you started.


Here is one that I will be making at a gathering on Thursday.

Yes, those are googly eyes!

This card was made with CTMH's Whoo Loves You stamp set. I love it and am so excited to finally make a card with it. The little hearts are from Priceless Love, a new set. The owl is paper pieced with Cocoa and Vineyard Berry ink. The paper is from our new Emporium Level 2 pack. Oh and a bit of Cocoa ribbon.


These are the valentines my 3-yr-old daughter, Arianna, and I made for her pre-school class. She picked the stamps, from our Life is a Jungle stamp set. She was also adamant that her cards have blue on them. She said it a number of times, that she had to have that blue paper! So she has met my challenge without even knowing it. The paper is from the Caprice Level 2 pack. The hearts are from Thoughtful Seasons and are stamped in Cranberry. Arianna coloured in the lions and hippos. I think she did a fabulous job choosing the products for her first set of valentines.